
Research Log: Page 28
Extracted posts from the KLOV Big Blue thread. View original page 28 on KLOV ↗
Post #541 — acblunden2, Jan 7, 2018
- Ok, so here is what I mean.
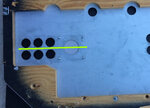
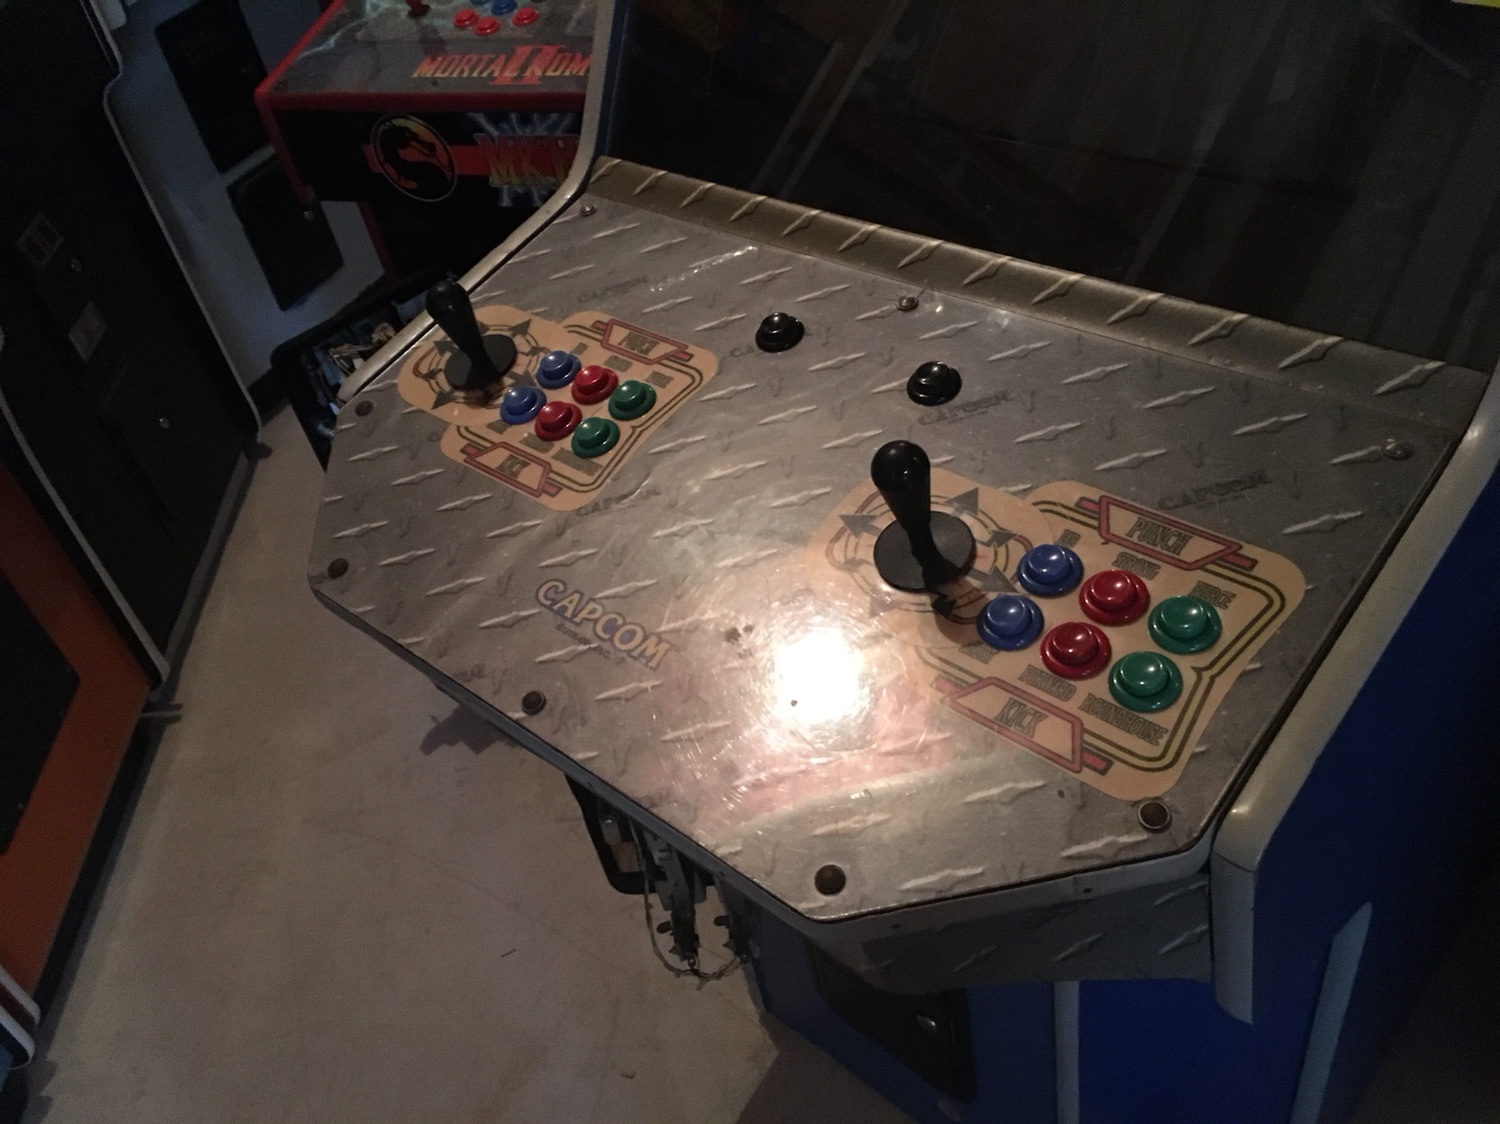
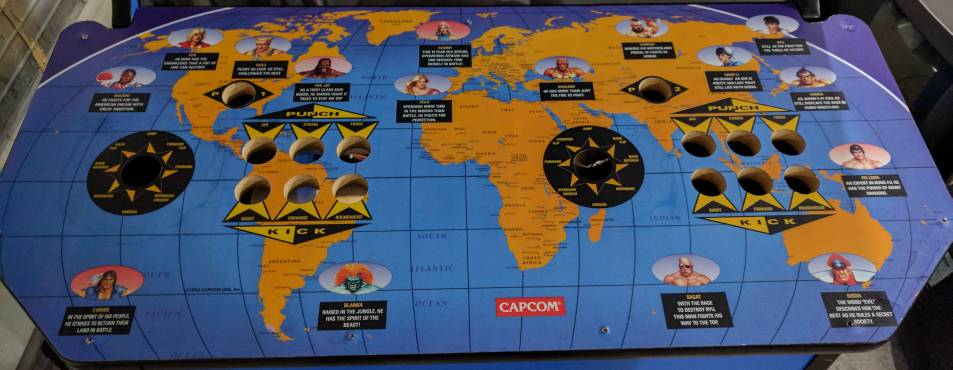
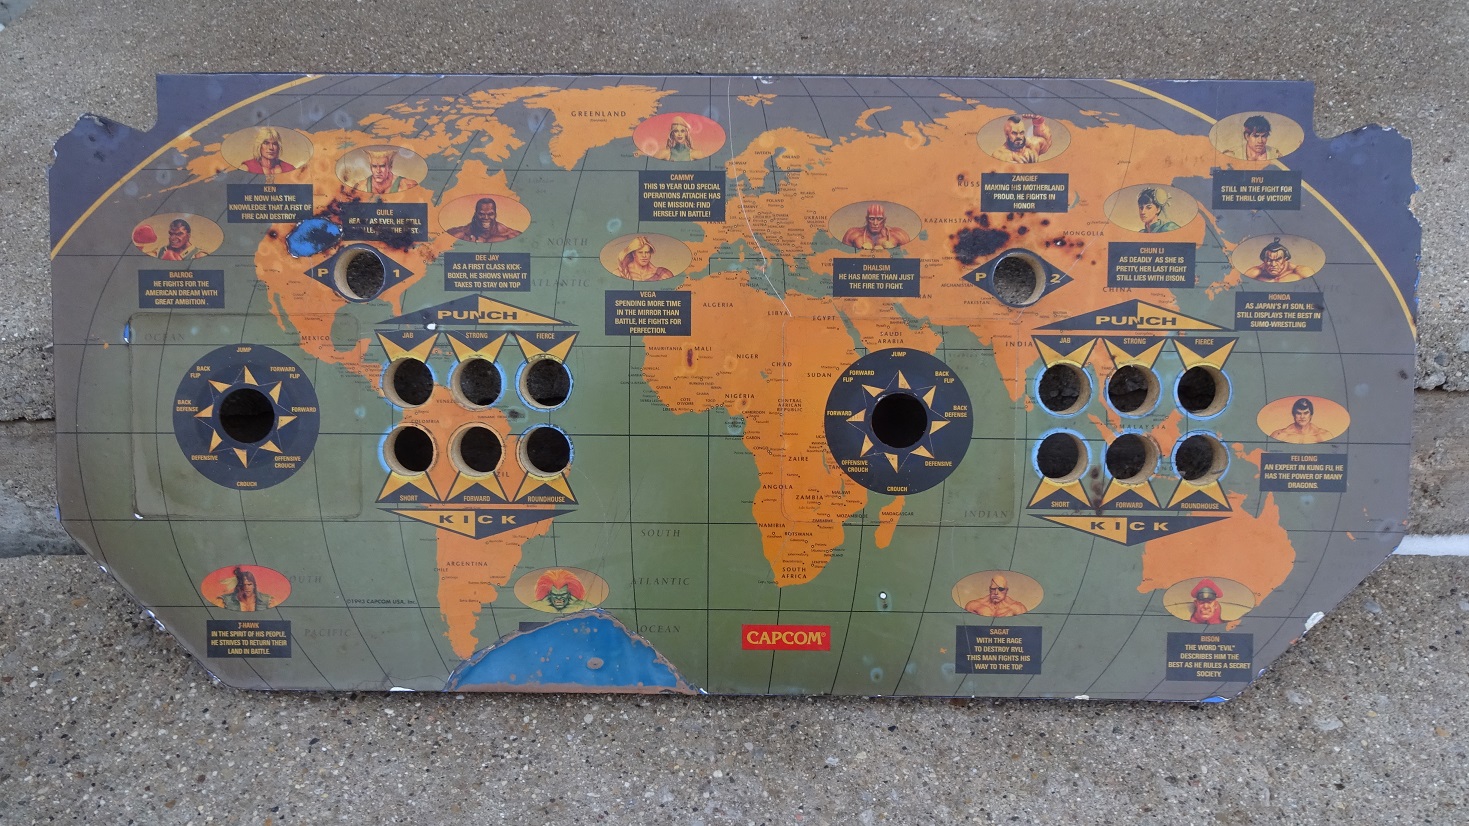
- The 1st photo is from an OG SF2CE Big Blue CP. The button on this variation of the 2P-6button CP, the center line of the joystick passes through the centerline between the two rows of buttons. This is the ideal Street Fighter configuration.
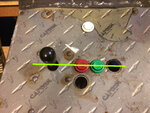
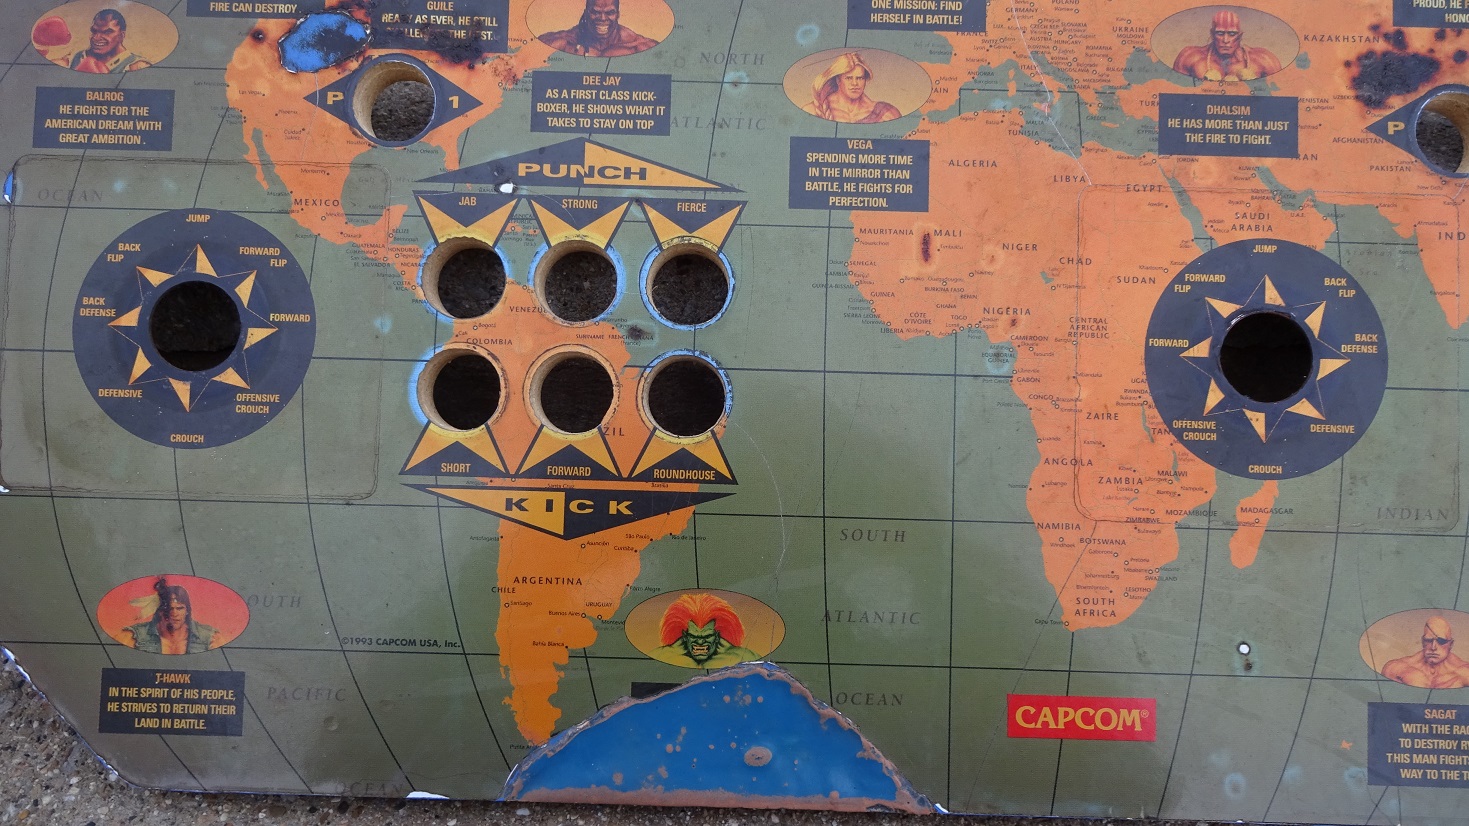
- The 2nd photo is also a 2P-6Button CP. It is OG as well and not a hacked up operator’s special. However, with this variant, the centerline of the joystick passes through the centerline of the top row of buttons. This is not typical.
- If you are picking up a CPO for the G1’s, I suggest the decals for the joystick and button graphics are printed separately. Once you put the Lexan over the top, it won’t make a difference that it isn’t an all-in-one decal. Also, what I am showing is just alignment. There may be other variants out there where spacing is also different.
Images:
Post #542 — acblunden2, Jan 7, 2018
- TravistyOJ said: Yup, it does Click to expand…
Post #543 — acblunden2, Jan 7, 2018
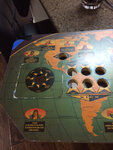
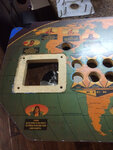
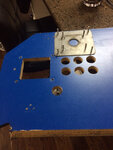
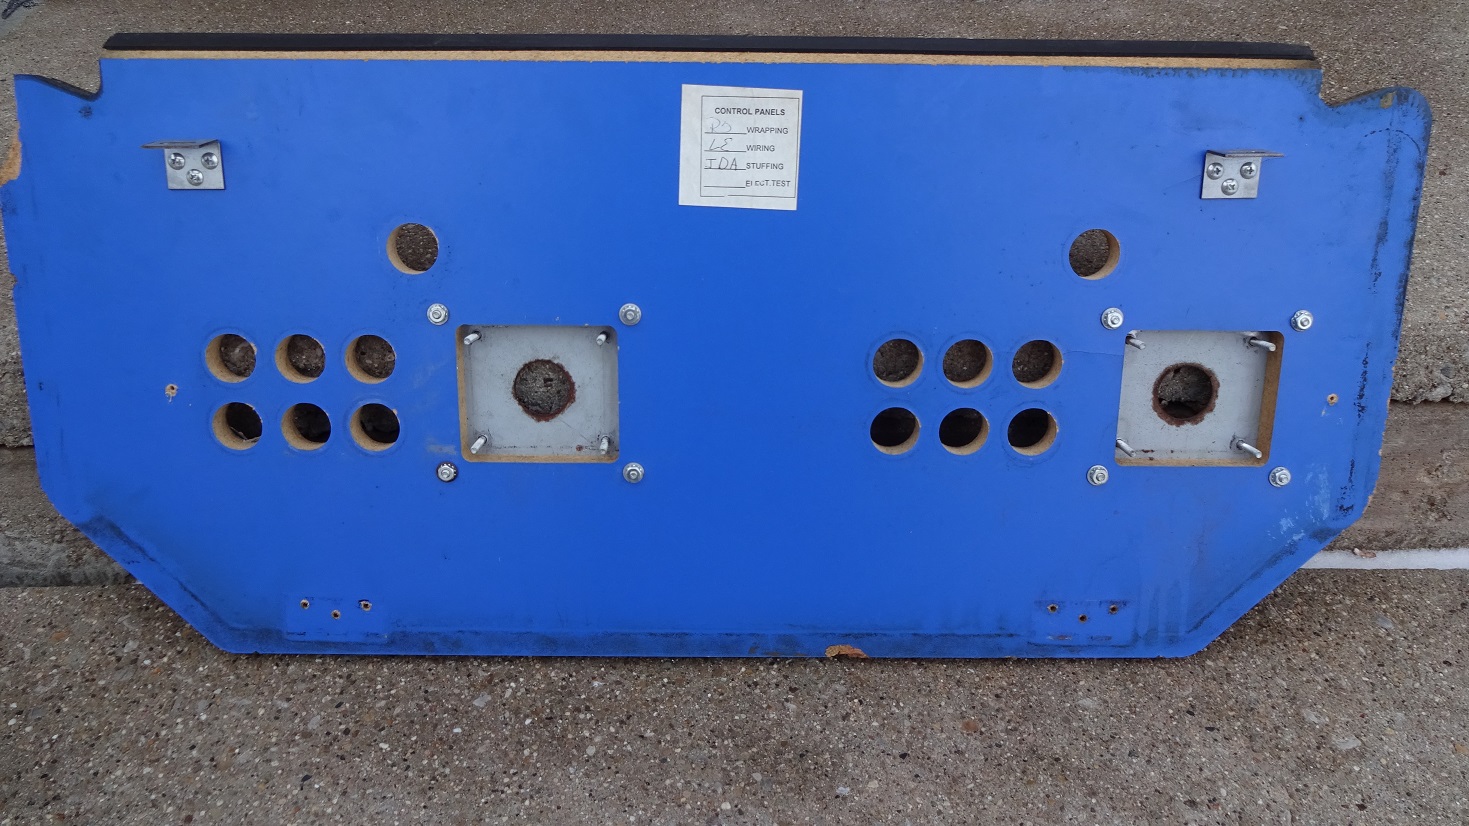
- Regarding the G2 CP reproduction, these photos show the wood panel is cut out completely through the panel for which a joystick mounting plate seats down into from the top. The top of the CP is beveled out about 1/8” so that the mounting plate sits flush with the top of the CP’s surface. That mounting plate is fastened to the underside of the CP where bolts keep it in place. The joystick then fastens to the mounting plate. The problem with this is that over time with play, movement will eventually ruin the CPO.
- I will suggest to boostin4hp to not cut the joystick mount all the way through the CP. Rather, bevel down leaving 1/4” to keep the top of the CP surface completely intact. Then fabricate the mounting plate (which I am thinking is 1/8” thick?) as in my earlier post. The end result is that we lose 1/4” in joystick height which is acceptable. But we gain a CPO that will last for a long time. Keep in mind, if there is no beveling or cut out, we lose 3/4” in joystick height as the joystick needs to be flush mounted with the bottom of the 3/4” thick CP.
Images:
Post #544 — TravistyOJ, Jan 7, 2018
- acblunden2 said: Alright cool. Then it will help everyone else out nicely as that is what most everyone will want to pick-up from boostin4hp. Out of curiosity, when exactly did you send it over to him? And please follow-up with him on that effort and keep us posted. Thanks! Click to expand…
Images:
Post #545 — sfernandes, Jan 7, 2018
- Why not just use lock tight on only the bolts that hold down the mounting plate and tighten it very good so with play it will not loosen since the lock tight will prevent that. That way it stays original. You could even use the permanent lock tight or even tack welld the bolts as you would never need to take that bracket off anyway, not even to replace the CP overlay or joysticks. Just an idea.
Post #546 — acblunden2, Jan 7, 2018
- sfernandes said: Why not just use lock tight on only the bolts that hold down the mounting plate and tighten it very good so with play it will not loosen since the lock tight will prevent that. That way it stays original. You could even use the permanent lock tight or even tack welld the bolts as you would never need to take that bracket off anyway, not even to replace the CP overlay or joysticks. Just an idea. Click to expand…
Post #547 — RetroGamerJP, Jan 7, 2018
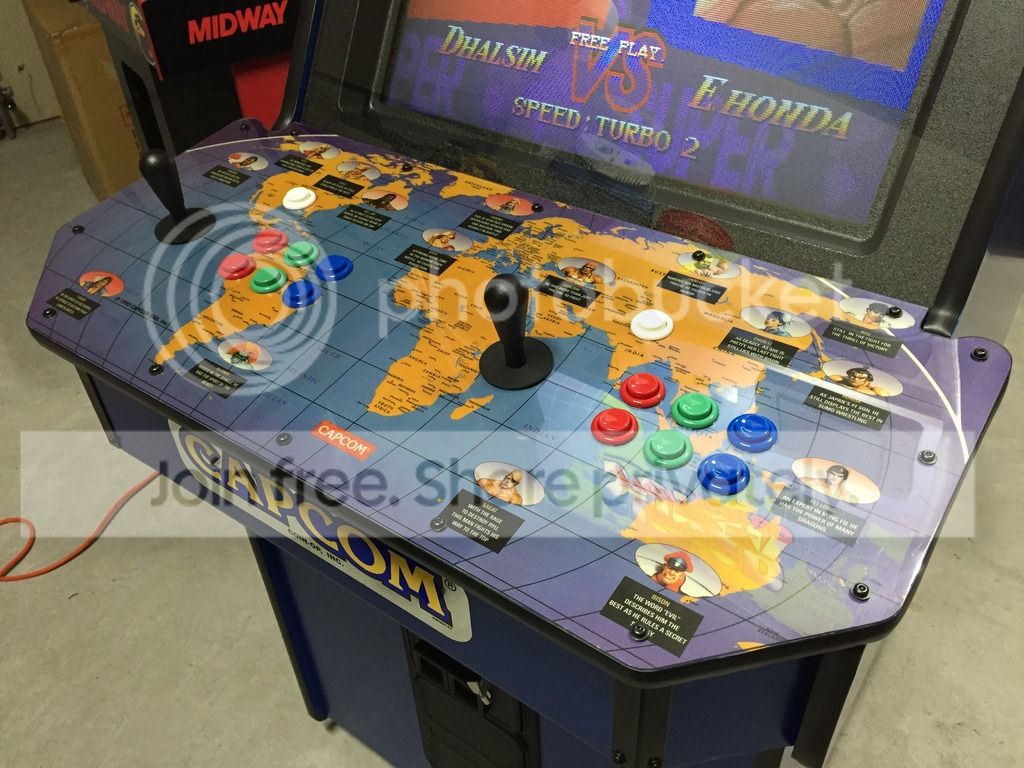
- When I did my Big Blue restore i cut two pieces of lexan the exact same shape as the control panel (via router flush bit) … one I attached my artwork to (which was a very thin sheet ---
- don’t recall thickness off the top of my head) and the other was the CPO protector as usual.
- I did this so that the art would be super smooth and not hindered by the plate in question and also have the benefit of moving the art to another cabinet if ever needed in the future.
Images:
Post #548 — sfernandes, Jan 7, 2018
- acblunden2 said: I can say that when I removed my mounting plate on my G2 CP, it was screwed on so tight, there was little chance of movement. And if there was any movement, it would be microscopic. But that is all it takes. Over time, that little movement coupled with the temperature expansion differences between the metal mounting plate and the wood panel, the factor of moisture absorption in the wood, heat, cold, the flexing of the metal, the degradation of the CPO material, will all contribute to rupturing the CPO. Once ruptured even ever so tiny would be like pulling a string on clothing that undoes the entire seam. And I think that has happened with all these CP’s. So, I don’t think Locktite or tack welding the bolt would help much here. Others can chime in here with how tight their mounting plates were screwed down and can attest to having the same problem still.
- Also, the OG mounting plate was designed to sit flush with the CP’s surface. It doesn’t. It is recessed in a bit and looks terrible; produces an indented rounded-corner box around the joystick. I am sure you can see this one yours as well. So for this problem as well, unless we have high precision machinery to produce that down to perfect tolerances, which I doubt we will for this effort, I see no point in copying the OG design. We can look to replicate the aesthetics and form, but should aim to improve on the function.
- The other thing that I think can be done is to go the same route is the G1 CP. Where the entire top of the CP is a single sheet of metal fastened down to a wooden plate where cut outs on that wood plate are made for the buttons and joysticks to mount. boostin4hp would have to be able to nibble the round curves on the top right/left corners to be able to do that. That is an option too. I am sure that makes it more expensive however. Click to expand…
Images:
Post #549 — sainrub, Jan 7, 2018
- TravistyOJ said: For reference here are a couple pics of the CP Click to expand…
Images:
Post #550 — acblunden2, Jan 7, 2018
- Yeap, mine looks like sainrub’s and like his, is definitely OG. sfernandes, you might have just lucked out and have one where the manufacturing tolerances were exact and don’t have the problem. Probably the exception and not the norm.
- Anyways, are you worried about authenticity or losing 1/4” in joystick height? Because I don’t see the problem unless this is a purist discussion.
Post #551 — sfernandes, Jan 7, 2018
- acblunden2 said: Yeap, mine looks like sainrub’s and like his, is definitely OG. sfernandes, you might have just lucked out and have one where the manufacturing tolerances were exact and don’t have the problem. Probably the exception and not the norm.
- Anyways, are you worried about authenticity or losing 1/4” in joystick height? Because I don’t see the problem unless this is a purist discussion. Click to expand…
Post #552 — acblunden2, Jan 7, 2018
- sfernandes said: but now I’m also worried if I have an exceptional cp and it’s tightened to spec that if I mess with it I may do more harm than good. Click to expand…
Post #553 — sfernandes, Jan 7, 2018
- acblunden2 said: I don’t think you have an exceptional CP. Closer examination of yours reveals it was retrofitted with Lexan at some point in time that likely prolonged the inevitable. If you look at yours and compare it to sainrub’s, yours is dotted around the edge with screw holes; sainrub’s isn’t. Those screw holes are there for nothing else other than to fasten down Lexan. Maybe Capcom got smart and ordered Dynamo to add the Lexan to later revisions. Who knows.
- Yeah man, we are trying to make reproductions here, not replicas. Those in the market are in need of a reproduction that solves some problems of inherited from the OG version as you can see. You’re lucky; you don’t have to be in the plight. Click to expand…
Post #554 — DuffCon, Jan 23, 2018
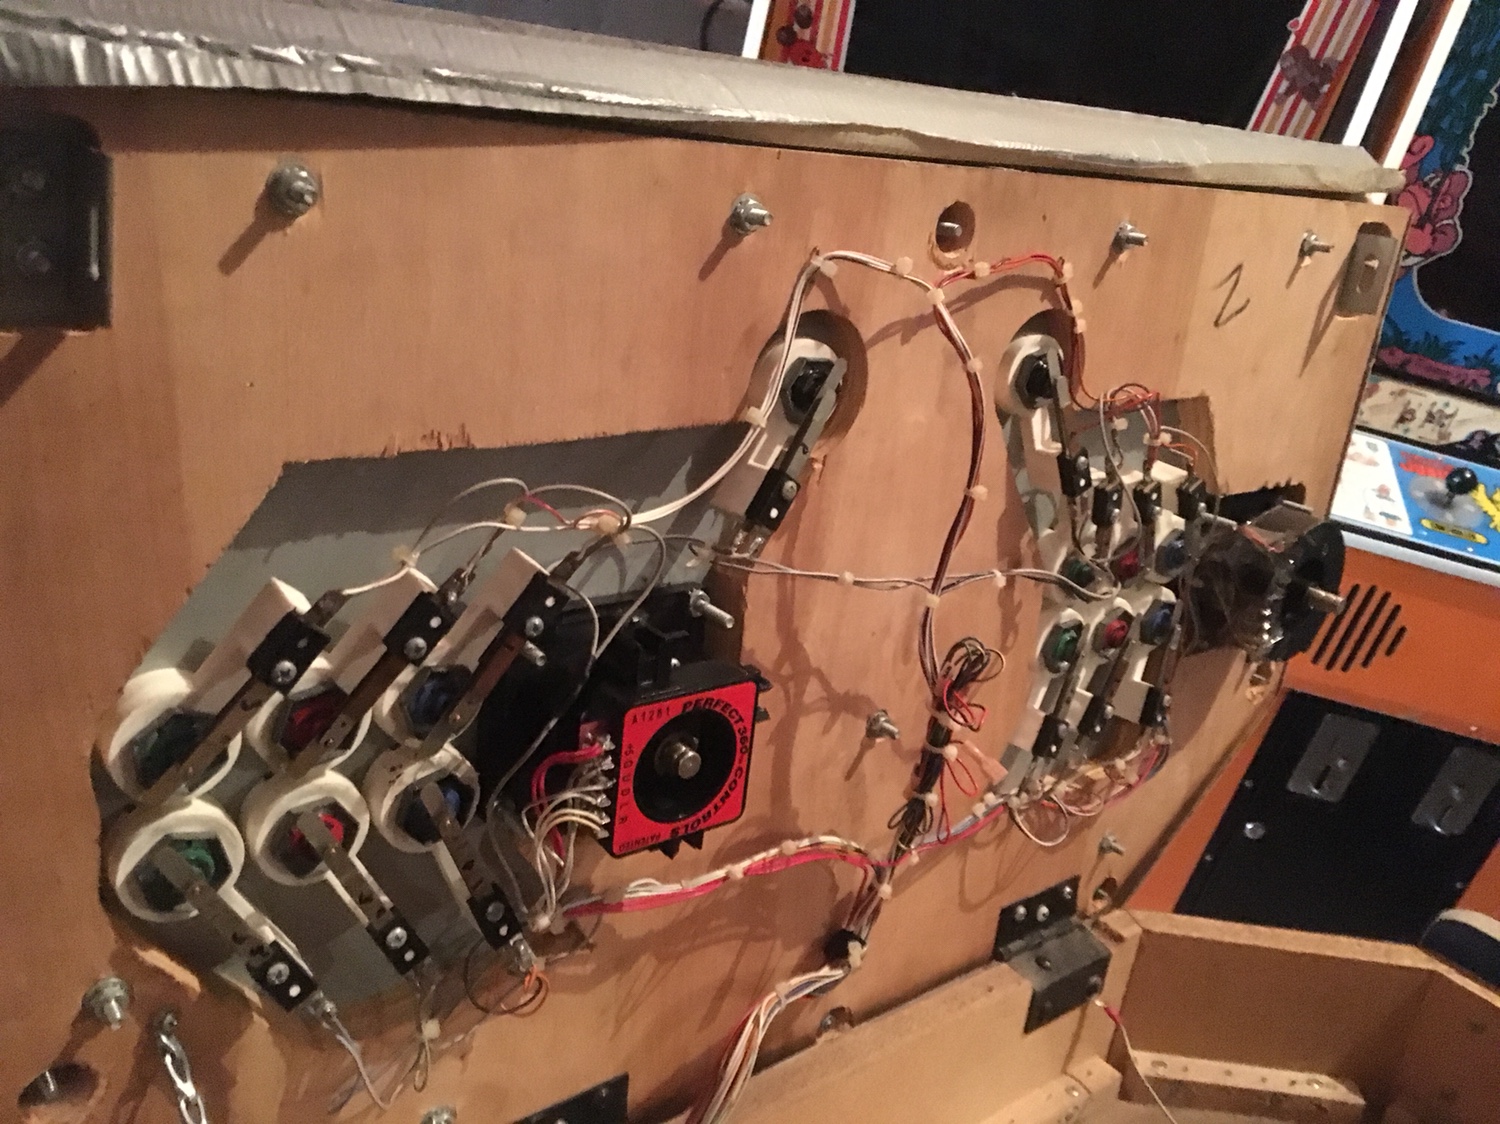
- Roughly speaking, how hard is it to “field strip” a CP off a 2nd generation Big Blue? I might have to do it to get one to fit in a mini-van. Do the controls have a harness that detaches? (like a molex connector). Ideally disconnect controls and unbolt/unscrew? Anyone know what hardware is holding it? I assume that a socket set / screwdriver would suffice…
Post #555 — acblunden2, Jan 23, 2018
- DuffCon said: Roughly speaking, how hard is it to “field strip” a CP off a 2nd generation Big Blue? I might have to do it to get one to fit in a mini-van. Do the controls have a harness that detaches? (like a molex connector). Ideally disconnect controls and unbolt/unscrew? Anyone know what hardware is holding it? I assume that a socket set / screwdriver would suffice… Click to expand…
Post #556 — streetlights, Jan 30, 2018
- hi…i have a gen1 big blue with a beat up control panel…does anyone reproduce these panels.?..and has anyone seen a reproduction panel with the japanese button/joystick configuration?
- i play 3rd strike on my big blue and have gotten too used to the japan configuration after playing on my ps2/ps3/ps4 over the years
- thanks!
Serial/tag references:
gen1— hi…i have a gen1 big blue with a beat up control panel…does anyone reprodu…
Post #557 — NoAffinity, Jan 30, 2018
- streetlights said: hi…i have a gen1 big blue with a beat up control panel…does anyone reproduce these panels.?..and has anyone seen a reproduction panel with the japanese button/joystick configuration?
- i play 3rd strike on my big blue and have gotten too used to the japan configuration after playing on my ps2/ps3/ps4 over the years
- thanks! Click to expand…
Images:

Serial/tag references:
gen1— streetlights said: hi…i have a gen1 big blue with a beat up control panel…does anyone reprodu…
Post #558 — TravistyOJ, Jan 30, 2018
- It’s like putting Happ’s in a candy, just feels wrong lol. Seriously though, you can set it up however you like. Repro panels are hopefully coming soon from Boostin
Post #559 — acblunden2, Jan 30, 2018
- NoAffinity said: Not likely. And I was getting ridiculed earlier in this thread for having sanwa parts in my big blue CP.
- Fear not, though, fellow purists, American parts have been returned to the panel. Click to expand…
Images: